Waterproofing a bathroom: microcement on the wall, Lavasteen Seamless Floor on the floor
A beautiful seamless bathroom in your colour — without grout lines, without tiles, completely waterproof. That's what most clients are looking for. Waterproofing your bathroom isn't as simple as applying one product everywhere: for the wall and for the floor, you choose a different material.
Below we explain why, and what the correct build-up is for each location: microcement on the wall, Lavasteen Seamless Floor on the floor.
Two Materials, Two Applications
- Microcement — for walls, including in the bathroom and shower.
- Lavasteen Seamless Floor — for floors in wet rooms (bathroom, shower, toilet).
In dry rooms (living room, bedroom, kitchen) you can use either — there it's a matter of taste and ease of maintenance.
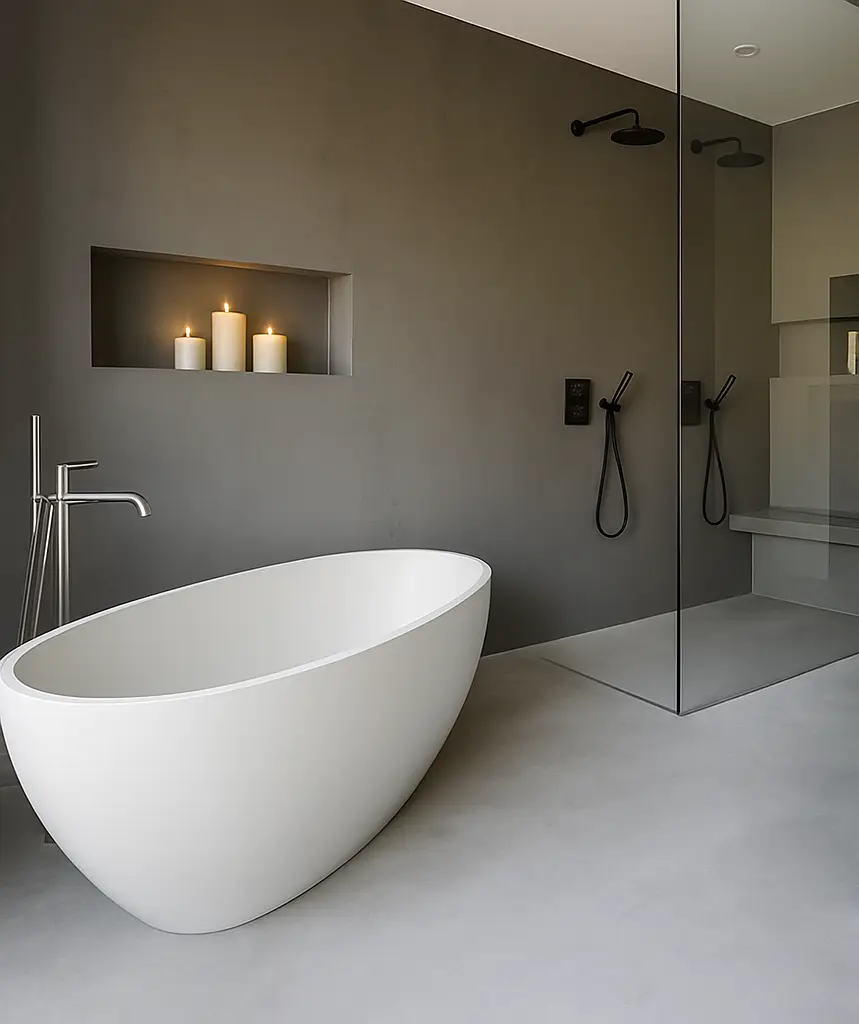
Microcement on the Bathroom Wall: Excellent Choice
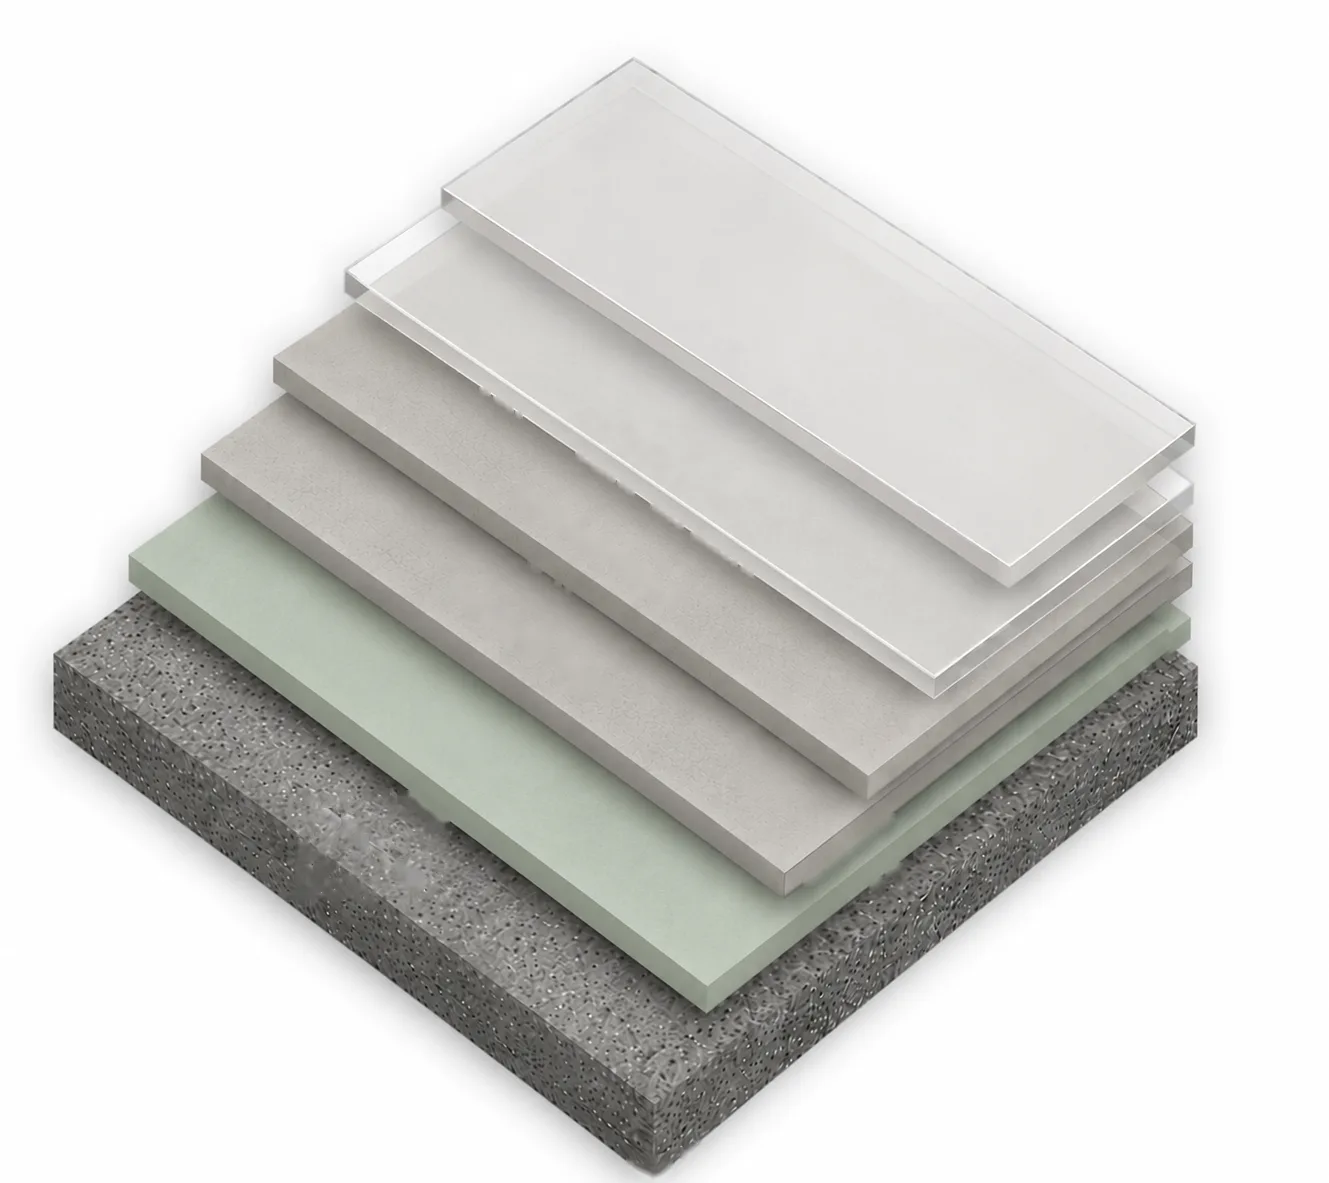
Microcement is inherently a mineral material. Bare, it attracts moisture — which you don't want. That's why we always finish it with a PU topcoat: a transparent top layer that seals the surface waterproof.
Think of the PU layer as a glass sheet over the microcement. As long as that sheet remains intact, no moisture can penetrate. On a wall that's no problem — nothing ever falls on a wall, the PU remains intact for years and does its job.
- Dry wall (living room, bedroom): 2 layers of PU topcoat.
- Wet wall (bathroom, shower, toilet): 3 layers of PU topcoat for maximum waterproofing.
Why Microcement Doesn't Belong on the Bathroom Floor
Nothing ever falls on a wall. On a floor it does. A perfume bottle, a hairdryer, tools that slip from your hand — if something like that falls on the PU topcoat, it can damage the glass sheet. A crack or scratch is then virtually invisible, but enough to let moisture creep underneath.
That moisture is immediately absorbed into the mineral microcement layer below. The result: consequential damage, limescale deposits, in the worst case water in the structure. That's why microcement is not a suitable choice for a floor where a lot of water is present — and that's exactly what a bathroom floor is.
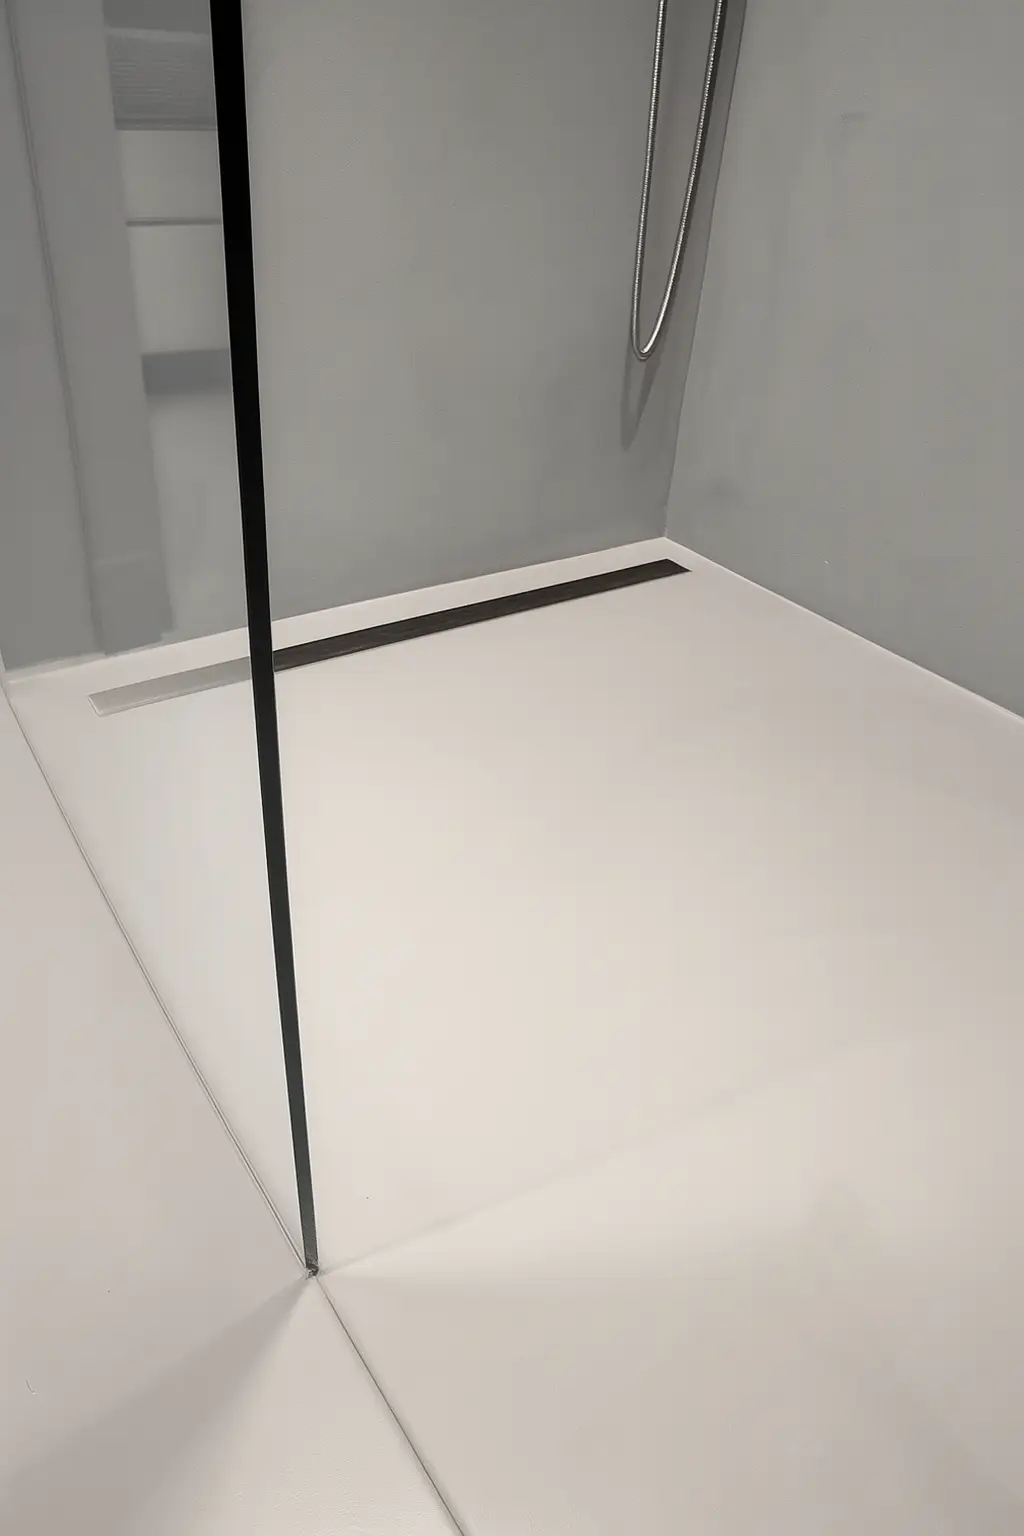
Lavasteen Seamless Floor on the bathroom floor: the solution
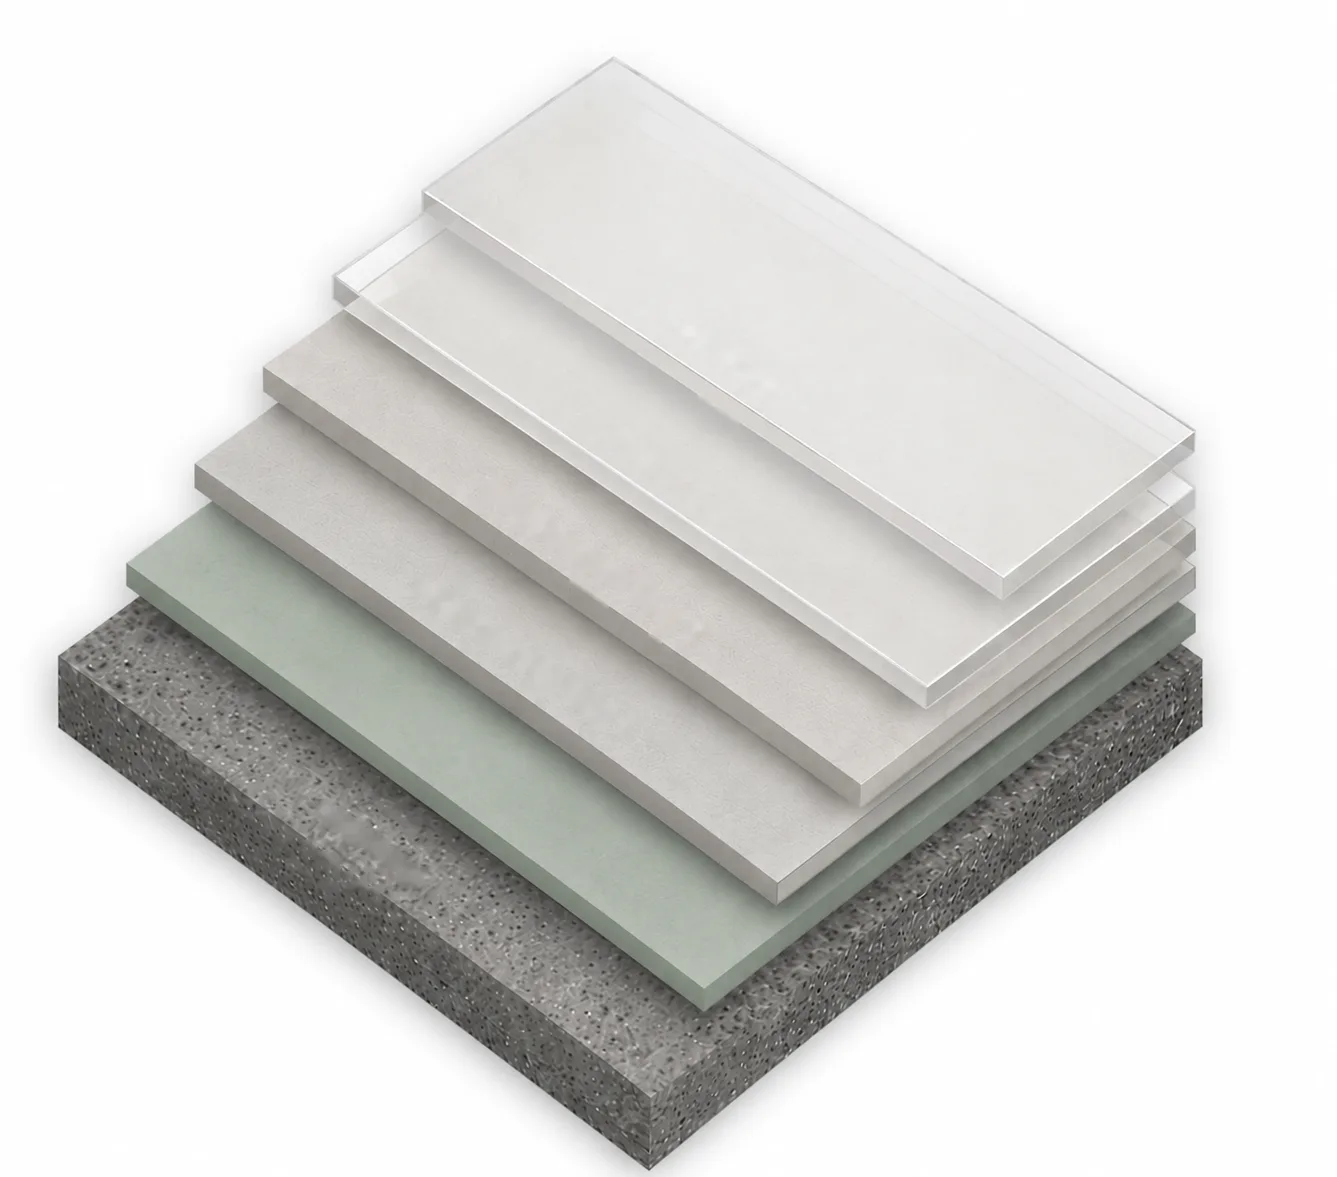
A Lavasteen Seamless Floor works fundamentally differently. It is epoxy-based, not mineral — and therefore inherently waterproof. There is no moisture-absorbing layer underneath waiting to take up water.
The most important difference: Lavasteen Seamless Floor remains waterproof, even when damaged. A scratch or crack? Annoying for the appearance, but your floor won't leak and your structure stays dry. That makes Lavasteen Seamless Floor the only sensible choice if you want to waterproof your bathroom floor.
- Lavasteen Seamless Floor bathroom floor: 1 coat of UV-resistant PU topcoat. Sufficient for extra protection and ease of maintenance — the waterproofing is already provided by the Lavasteen itself.
Lavasteen Seamless Floor in dry rooms: more PU for ease of maintenance
In a living room or bedroom you can choose multiple coats of PU on your Lavasteen Seamless Floor. Not for waterproofing — that's not necessary — but because Lavasteen naturally has an open structure. The more PU coats, the smoother and tighter the surface, the easier to clean.
A consideration: smoother surface = less grip. On a living room floor that's no problem. On a bathroom floor you don't want to seal everything completely — there the natural matte finish is preferable for slip resistance.
Application Technique: Sealing Lavasteen with Water
An experienced applicator can make the open structure of Lavasteen denser during application. The technique: after applying the second layer of Lavasteen, the surface is lightly misted with water. This creates a thin, watery slurry layer that closes the structure.
Result: a denser, flatter surface that's easier to clean and may require fewer PU layers for ease of maintenance. Whether this technique is applied depends on the applicator and your preference.
Summary: Which Material Where?
- Living area wall: microcement, 2 layers of PU
- Bathroom/shower/toilet wall: microcement, 3 layers of PU
- Bathroom/shower/toilet floor: Lavasteen Seamless Floor, 1 coat of UV-resistant PU
- Dry room floor: Lavasteen Seamless Floor or microcement, 1-3 coats of PU to taste
Need help choosing?
Every space is different. Unsure about the right build-up, the number of PU layers or which colour suits best — let us take a look. Request a no-obligation quote or get in touch directly.